Best Dog Barriers for Headrestless Seats
By Luis Andrade • 27th Mar
Finding a headrestless dog car barrier that works reliably is one of the most overlooked installation challenges in vehicle protection. If your car, vintage sedan, older pickup, or convertible lacks rear headrests (or if those headrests don't provide solid anchor points), you're facing a gap that most barrier guides simply ignore. The good news is that solutions exist. They require clear measurement, an honest assessment of your seat geometry, and the right tools to ensure a silent, secure fit. Let's walk through the specifics so you can make the right choice and avoid the frustration of a barrier that slides, sags, or doesn't stay put.
What Makes Headrestless Installations Different?
Most dog barriers for headrestless seats rely on seat frames, cargo anchors, or the cabin structure itself rather than headrest posts. For vehicle-by-vehicle considerations, see our SUV vs sedan dog barrier fit guide to match anchor points and geometry. Unlike headrest-mounted designs that clip or loop around vertical pillars, a headrestless setup must anchor to:
- Seat frame brackets and edges (bolted through the seat cushion or attached to the base)
- Cargo tie-down loops (LATCH/ISO-FIX anchors in the rear floor or cargo area)
- Door frame sills and upper-door trim (with careful use of padded hooks or adhesive-backed anchors)
- Existing seatbelts (threaded through barrier loops (a secondary restraint method)) To avoid conflicts with airbags and LATCH systems, review our guide to airbag-compatible restraints.
- Center console or cargo lip edges (using straps or spring clamps)
The critical difference: you lose the high-leverage anchor point that headrests provide. This means torque, measurement, and sequence become your best friends.
Tools Needed:
Before selecting a barrier type, gather these essentials: If you're new to installs, our step-by-step installation guide walks through tool use, torque, and safety checks.
- Steel calipers or digital measuring tape (to check seat gap width, cargo floor to seat depth, and door-frame clearances)
- Threadlocker compound (medium strength) and a small screwdriver set
- Padded anchor hooks or soft-jaw clamps (to prevent marks on trim)
- Torque wrench or clicking wrench (to ensure even, repeatable tension on bolts)
- Rubber shims or thin spacers (to level a barrier that lists left or right)
I learned this lesson the hard way. When I first installed a barrier in a CX-5, I thought headrest posts were identical across years (until I measured). The 2019 posts had a different taper than the 2021. The 2019 installation rattled until I added a millimeter-thick spacer under one bracket. That taught me to carry calipers, threadlocker, and patience. Clean installs aren't magic; they're measurements, sequence, and torque.
Which Barrier Types Work Without Headrests?
Net and Mesh Barriers (Tool-Free, Flexible)
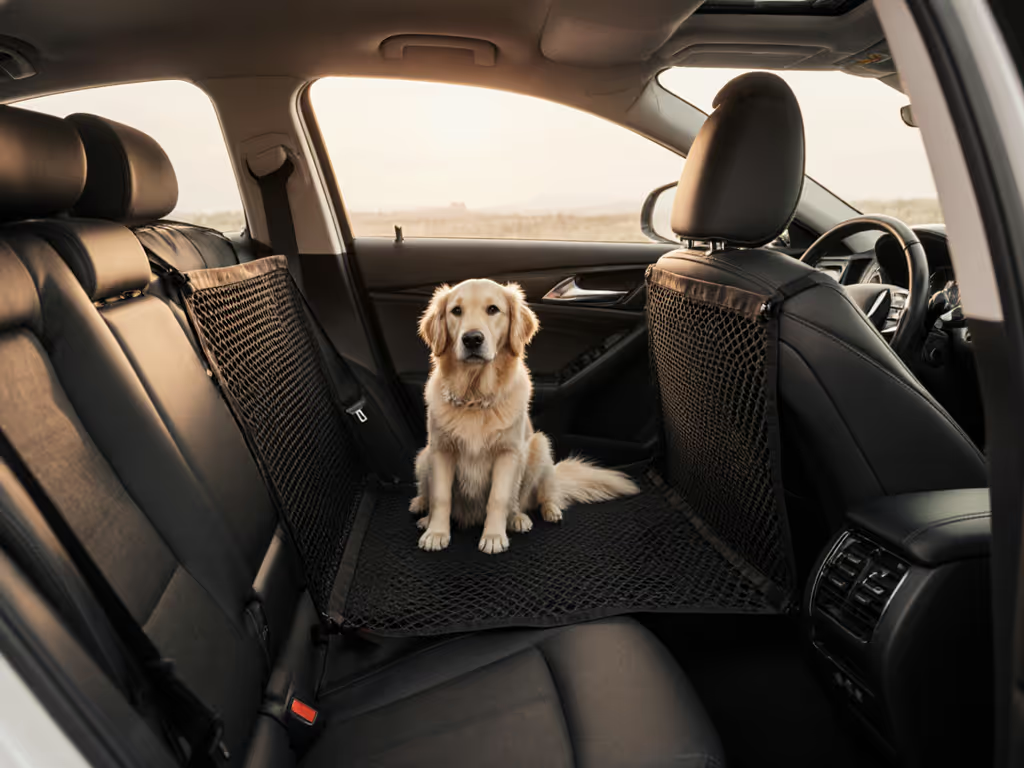
Net barriers like the Dykeson Dog Car Net Barrier use elastic mesh and include hooks that attach to existing anchor points. Their key advantage: universal fit and no drilling required. The four-sided elastic dual mesh stretches to fit most cars and SUVs, and installation takes about a minute.
Fit for headrestless cars: These work if your vehicle has cargo-area anchor loops or if you can safely route straps around the rear seat frame. The downside is drift, the mesh can shift side-to-side during hard braking unless the straps are routed under tension and checked regularly.
Measurement step: Measure the distance from the rear seat edge to the cargo floor, and the width of the open cargo area. Confirm your car has at least two accessible anchor points (cargo tie-downs, seat-frame bolt-holes, or door-sill notches).
Steel-Frame Barriers (Rigid, Quiet)
Heavy-duty options like the CJYMMFAN Dog Barrier use steel framing and chew-resistant mesh. Steel frames hold position better than net alone, especially in smaller vehicles or with larger dogs that push against the barrier.
Fit for headrestless cars: Steel-frame barriers must be custom-bolted to seat frames or cargo anchors. This requires more precision. You'll need to locate and verify the exact bolt-hole pattern on your seat base, drill new holes if necessary (check for wiring beneath), and use washers and threadlocker to ensure bolts don't back out.
Measurement step: Photograph the underside of your rear seat and cargo area. Locate existing bolt holes, LATCH anchors, or threaded inserts. If none exist, mark potential anchor points and use a metal-detector pen to confirm there's no hidden wiring before drilling.
Adjustable Door-Protector Barriers (Seat-Frame Anchoring)
Some designs, like certain K&H products, technically mount as door protectors but can be routed around seat frames. They hook around front headrests if available, but in a headrestless car, the same straps can loop under and around the rear seat cushion frame or under the seat base.
Fit for headrestless cars: This works only if your seat frame is accessible (no solid plastic undercarriage) and if you're willing to anchor straps underneath, where they're less visible but harder to adjust. Verify that straps don't contact electrical harnesses or brake lines.
Comparison: Which Approach Is Quietest and Most Secure?
| Barrier Type | Anchor Method | Installation Difficulty | Rattle Risk | Dog Space & Comfort | Best For |
|---|---|---|---|---|---|
| Net/Mesh (Elastic) | Cargo loops, hooks | Very easy (no tools) | Moderate (drift in hard braking) | High (flexible, open) | Urban commutes, small dogs, frequent removal |
| Steel Frame | Bolted to seat/floor | Moderate (measuring, bolt-finding) | Low (rigid, locked position) | Moderate (fixed size) | Long trips, larger dogs, vehicles with accessible seat frames |
| Door Protector Routed Under Seat | Seat-frame straps | Moderate (awkward access) | Moderate (depends on under-seat routing) | High (partial coverage) | Headrestless sedans with visible seat frames |
The quiet install: A bolted steel-frame barrier with threadlocked fasteners and rubber dampening shims will not rattle (if the sequence is correct). Use washers, apply threadlocker to each bolt, and check torque after 100 miles of driving. If it rattles, we refit until it doesn't.
Addressing Gaps in Headrestless Vehicles
Without headrests, dogs can squeeze through side gaps or jump over lower barriers more easily. Counter this by:
- Extending the barrier height: Steel-frame options often come with optional side panels or can be modified. Measure from seat back to roof and verify the barrier reaches at least mid-window level.
- Narrowing seat gaps: Use foam padding or aftermarket seat-gap blockers (wedge-shaped spacers that fit between seat cushions) to close lateral escape routes.
- Testing fit before driving: Never assume a barrier is secure until you've run a full brake test in an empty lot. A 50-pound dog jumping forward into the front seat is a real safety hazard.
- Using secondary restraint: Pair a barrier with a crash-tested harness or portable crate secured to cargo anchors. This redundancy is critical in headrestless vehicles where a single anchor failure could release your dog.
Model-Year Awareness and Seat Geometry
Seat construction changes year to year. A 2021 sedan's seat-frame bolts may not align with a 2024 refresh. Before purchasing, confirm:
- Year, make, model, and trim (base vs. sport vs. luxury trims often have different seat architecture)
- Seat-slide adjustment range (some vehicles have deeper tracks than others; measure from the fixed part of the frame)
- Cargo-floor height and slope (hatchbacks and SUVs vary widely; a barrier that fits a 2020 RAV4 may not clear the 2023 redesign's wheel-well shape)
Documentation from the manufacturer (or a phone call to the barrier maker's support team) beats guesswork. Reputable brands will ask for your VIN and confirm compatibility before you buy.
Installation Sequence for a Rattle-Free, Secure Fit
- Measure twice: Verify cargo width, depth, seat-back to roof height, and anchor-point locations. Write down exact measurements.
- Stage the barrier: Loosely position it in the vehicle. Check for gaps and list. Use shims or adjust side panels.
- Locate and mark anchors: Mark bolt holes or strap-routing points with tape. Double-check for wiring or fuel lines underneath.
- Install fasteners in sequence: Tighten bolts in a cross pattern (front-left, rear-right, front-right, rear-left) to avoid binding. Use even pressure, not maximum force.
- Apply threadlocker: Once satisfied with fit, remove bolts one at a time, coat the threads, and reinstall. Allow to cure per product instructions (usually 24 hours).
- Test before trust: Drive in an empty lot, brake hard, accelerate, and listen. If noise appears, return to step 3.
Practical Next Steps
If your vehicle lacks headrests or you're skeptical of universal fit claims:
- Measure your vehicle first (don't rely on the product photo). Record cargo width, depth, seat-back height, and available anchor points.
- Contact the barrier maker directly with your vehicle's exact year, make, model, and trim. Ask if they have a fitfinder or fitment guide. If they're vague, move on.
- Check for aftermarket reviews from your exact vehicle (not just "works great," but specifics: "fits perfectly in a 2022 Honda Odyssey EX; cargo width 47 inches; no gap above barrier").
- Invest in calipers, threadlocker, and a torque wrench (if you plan multiple installs or long-term security). They're inexpensive and transform an amateur job into a professional one.
- Plan for secondary restraint: Pair any barrier with a harness, crate, or carrier secured independently. This is especially critical in headrestless cars where a single point of failure matters more. To understand what 'crash-tested' really means and how to evaluate claims, see our deep dive on pet restraint crash testing.
Your dog's safety and your peace of mind both depend on precision, not hope. A headrestless install requires an extra layer of measurement and verification, but the result: a silent, unmoving barrier that keeps your dog secure through hard braking, emergency maneuvers, and long road trips, is worth the effort.
Related Articles